Vegetable Sowing Schedule #1: Day 1 - Sowing the years first vegetables
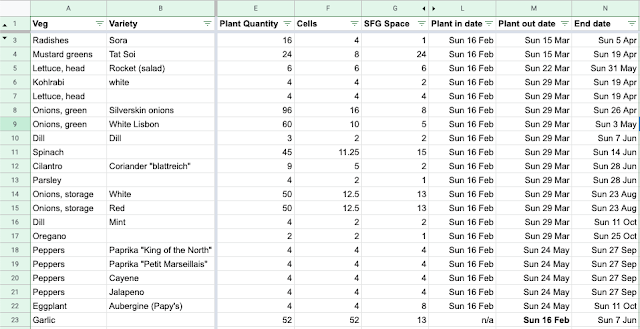
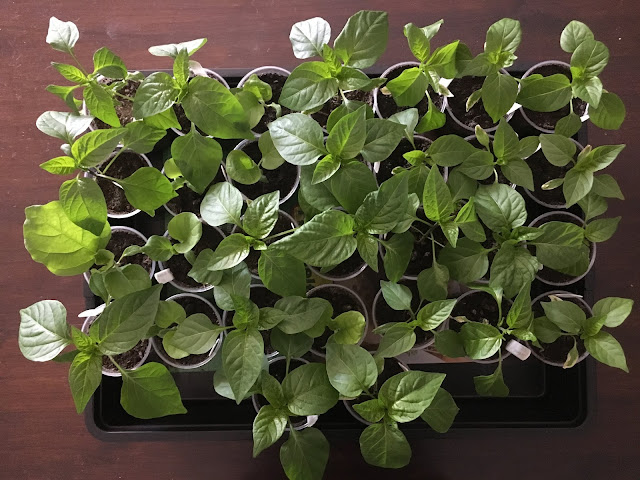
Feb 16th is the first day of my planting calendar. Well I cheated a little this year and started the aubergines, peppers and chillis indoors on Feb 2 so maybe next year I'll update the calendar and plan to start even earlier.
I created my planting schedule back in December and have every sowing and planting out date for the year planned.
I created my planting schedule back in December and have every sowing and planting out date for the year planned.
 |
| Feb 2020 Sowing Calendar |
Most of the February sowings will be kept under cover in a green house until they are planted out, so they will be sheltered from the weather but not heated. The exceptions are the peppers & aubergines, which will be sown indoors (you can read more about that in my series on growing peppers indoors), and the garlic which will planted directly into the garden.
As all of my planting dates for the year are planned I need to know where transplants will go in the garden. In addition to the sowing & planting calendar I created monthly maps of the vegetable garden so I know what gets transplanted into each position every month. This succession planning helps me get the most out of my vegetable garden. The plan for February looks quiet bare but actually the garden still has salads and kale that have been growing through the winter.
As all of my planting dates for the year are planned I need to know where transplants will go in the garden. In addition to the sowing & planting calendar I created monthly maps of the vegetable garden so I know what gets transplanted into each position every month. This succession planning helps me get the most out of my vegetable garden. The plan for February looks quiet bare but actually the garden still has salads and kale that have been growing through the winter.
 |
| Feb 2020 Planting Layout |
The first task of the day is to collect up all of the seeds I will be sowing. Some are left over from last year and others were bought in January once the planting calendar was complete.
Before heading out to the greenhouse I write up the seed labels with the crop name, sowing date and number of seeds being sown. This is helpful for several reasons:
- It's cold outside, even in the greenhouse, so I don't want to spend too long out there.
- Writing the number of seeds to be sown per cell avoids me needing to make a copy of the sowing plan.
- Writing up seeds labels with compost on my hands doesn't go well (at least for me)... I end up with dirty smudged labels that are hard to read.
I experimented here with writing everything on one side of the the label or some of the information on the back. I decided it's much better to have everything on the front.
 |
| Planting labels prepared before heading outside to start sowing. |
I'm generally following the sowing methods taught by Charles Dowding, sowing almost everything into modules and planting out after 4-5 weeks. His videos are a great source and inspiration and encouragement, I highly recommend watching as much of the Charles Dowding's YouTube channel as you can find time for.
One difference from Charles' method that I've adopted is to rely on bottom watering the compost. I find filling the trays with fully wet compost to be messy and have never found a watering can rose that is fine enough to water seed trays without a lot of disturbance. Instead I sow into the compost however it comes out of the bag, fill a large growing tray with water and place the modules into the water. Within 10-15 mins the compost is saturated and I pour out the excess.
 |
| Seed modules after sowing, ready for bottom watering. Overwintered chard seedlings in the background. |
For the garlic, my plan was to grow 52 "Rocambole" bulbs. Small mistake though, I mis-translated the details when ordering from a German website and ordered 9 cloves instead of 9 bulbs. Not being able to find any organic cloves for planting in local garden centres I decided to try planting regular garlic bought from a supermarket. I'm sure I've read advice not to do this, but 🤷 - let's see what happens!
After breaking up the shop bought garlic into cloves I prepared the bed. Ideally I shouldn't have needed any bed prep as I'm trying to follow the No Dig method advocated by Charles Dowding. However:
- I haven't found a source of affordable compost that comes in less than 5,000 litre loads. I need around 1,000 litres and last year bought 24 40 litre bags from a garden centre. The cost is the same as having 5,000 litres delivered, but where would I put it? This year I will unfortunately need to be more conservative with compost.
- As I don't have deep compost I end up planting through the compost into the soil. I discovered last year that the soil here is very dense and had problems in some areas making holes for transplanting.
- I didn't keep on top of weeding over the relatively warm winter and the beds were covered in weeds.
My bed prep consisted of:
- Forking the bed every 15cm (6 inches) to loosen the soil, but without turning it. I push the fork all the way in and then gently lean it back until the soil lifts then place it back.
- Hoeing the surface to remove weeds
- Raking to even out the mess I made in the above two steps
Not too much work and actually very satisfying.
Next I start planing the garlic in the planned bed. The garlic is planted in two rows 15cm apart, with bulbs 15cm (6 inches) apart in each row. I also stagger the planting of the two rows to give each plant as much space as possible. I start planting by stretching a string to mark the row then use an old broom handle to make 5cm (2 inch) deep holes. Once all the planting holes are made I drop a clove into each one, being careful to have the rooting end pointing downwards, and then fill the hole with a handful of fresh shop bought compost.
 |
| Planting holes for garlic carefully planned out with a string and old broom handle |
And that's the end of planting day #1 for 2020. Now back to growing peppers indoors...


Comments
Post a Comment